Check our terms and conditions, privacy policies, and cookies policy.
Copyright 2024 © All rights Reserved. Designed by LACNet
Here you will find instructions for the deployment of nodes on OpenShift using HELM. This implies that it will be executed from a local machine on a remote server. The local machine and the remote server will communicate via helm.
During the process of node deploying, you will be asked about the network in which you would like to deploy your nodes. In order for your node to get permissioned, you need to complete the permissioning process first. In order to understand better what are the types of networks available and the permissioning processes for each network, please read permissioning process.
Recommended hardware features for Besu node:
| Recommended Hardware | On Mainnet-Omega | On Open ProTestnet | On Legacy ProTestnet (DEPRECATED) |
CPU | 4 vCPUs compute optimized | 4 vCPUs compute optimized | 2 vCPUs |
RAM Memory | 16 GB | 16 GB | 8 GB |
Hard Disk | 375 GB SSD | 50 GB SSD | 250 GB SSD |
IOPs | 70,000 IOPS READ 50,000 IOPS WRITE | 70,000 IOPS READ 50,000 IOPS WRITE | 15,000 IOPS READ 5,000 IOPS WRITE |
OpenShift: Cluster.
It is necessary to enable the following network ports in the machine in which we are going to deploy the node:
Besu Node:
Nginx:
For this installation we will use Kubectl. It is necessary to install Kubectl on a local machine that will perform the installation of the node on a kubernetes cluster. Following the instructions to install kubectl in your local machine.
For this installation we will use oc. It is necessary to execute some openshift commands on a local machine that will perform the installation of the node on the openshift cluster.
Following the instructions to install oc in your local machine.
For this installation we will use Helm. It is necessary to install helm on a local machine that will perform the installation of the node on a kubernetes cluster. Following the instructions to install helm in your local machine.
To configure and install Besu you must clone this git repository in your local machine.
					$ git clone https://github.com/LACNetNetworks/besu-networks
$ cd besu-networks/helm/
There are three types of nodes (Bootnode / Validator / Writer) that can be created in the LACChain networks orchestrated by LACNet at this moment.
There are three types of values which corresponde to the four types of nodes: bootnode.yml, validator.yml, writer.yml. The values you have to set are in the deploy section. These are the following:
Values:
Note: set Environment variable on values helm at directory /helm/values. type node bootnode file bootnode.yml, validator file validator.yml and write file writer.yml
e.g. set Environment on helm values at file /helm/values/writer.yml.
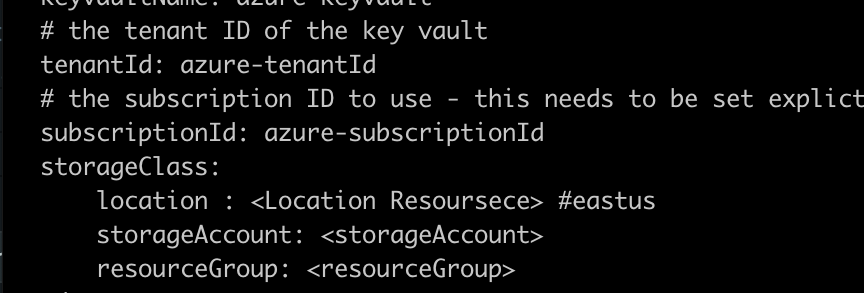
TCP Public IP Ingress: Generate a static public IP in your cloud provider. Then replace the public ip in the load balance (loadBalancerIP) service manifest. finally update the publicIP environment variable with this IP.
P2P Public IP Egress: Outgoing p2p traffic to synchronize besu nodes. This is the permissioned IP for the network.
Since Openshift is using a more secure approach than kubernetes, it is needed to isolate and give permissions to the service account it will be running some blockchain components
					oc new-project lacchain

cat << EOF | oc create -f -
apiVersion: rbac.authorization.k8s.io/v1
kind: ClusterRole
metadata:
  name: SecretsRole
rules:
- apiGroups: ['']
  resources: ['secrets']
  verbs:     ['get','create']
EOF

oc adm policy add-cluster-role-to-user SecretsRole system:serviceaccount:kube-system:persistent-volume-binder
We should need to create as well, another configuration related to the service account running the workload binding to the blockchain network.
					oc create sa sa-lacchain

oc adm policy add-scc-to-user anyuid -z sa-lacchain
cat <<EOF | oc apply -f -
apiVersion: v1
kind: SecurityContextConstraints
metadata:
  name: my-custom-scc
# Privileges
allowPrivilegedContainer: false
# Access Control
runAsUser:
  type: RunAsAny
seLinuxContext:
  type: RunAsAny
fsGroup:
  type: RunAsAny
supplementalGroups:
  type: RunAsAny
# Capabilities
defaultAddCapabilities:
  - SYS_CHROOT
requiredDropCapabilities:
  - MKNOD
allowedCapabilites:
  - NET_ADMIN
users:
  - system:serviceaccount:lacchain:sa-lacchain
EOF

oc adm policy add-scc-to-user my-custom-scc sa-lacchain
This step will create a resource group outside of the Azure Red Hat OpenShift (ARO) cluster’s resource group. This resource group will contain the Azure Files shares that are created by Azure Red Hat OpenShift’s dynamic provisioner
					AZURE_FILES_RESOURCE_GROUP=aro_azure_files
LOCATION=eastus

az group create -l $LOCATION -n $AZURE_FILES_RESOURCE_GROUP

AZURE_STORAGE_ACCOUNT_NAME=aroazurefilessa

az storage account create --name $AZURE_STORAGE_ACCOUNT_NAME --resource-group $AZURE_FILES_RESOURCE_GROUP --kind FileStorage --sku Premium_LRS
This step will create a resource group outside of the Azure Red Hat OpenShift (ARO) cluster’s resource group. This resource group will contain the Azure Files shares that are created by Azure Red Hat OpenShift’s dynamic provisioner
					ARO_RESOURCE_GROUP=<name-resource-cluster>
CLUSTER=<name-cluster>
ARO_SERVICE_PRINCIPAL_ID=$(az aro show -g $ARO_RESOURCE_GROUP -n $CLUSTER --query servicePrincipalProfile.clientId -o tsv)

az role assignment create --role Contributor --scope /subscriptions/<SubscriptionID>/resourceGroups/aro_azure_files --assignee $ARO_SERVICE_PRINCIPAL_ID
The OpenShift persistent volume binder service account will require the ability to read secrets. Create and assign an OpenShift cluster role to achieve this.
					ARO_API_SERVER=$(az aro list --query "[?contains(name,'$CLUSTER')].[apiserverProfile.url]" -o tsv)

oc login -u kubeadmin -p $(az aro list-credentials -g $ARO_RESOURCE_GROUP -n $CLUSTER --query=kubeadminPassword -o tsv) $ARO_API_SERVER

oc create clusterrole azure-secret-reader \
	--verb=create,get \
	--resource=secrets

oc adm policy add-cluster-role-to-user azure-secret-reader system:serviceaccount:kube-system:persistent-volume-binder
Persistent Volume Claims are namespaced objects . Mounting RWX/ROX is only possible within the same namespace.
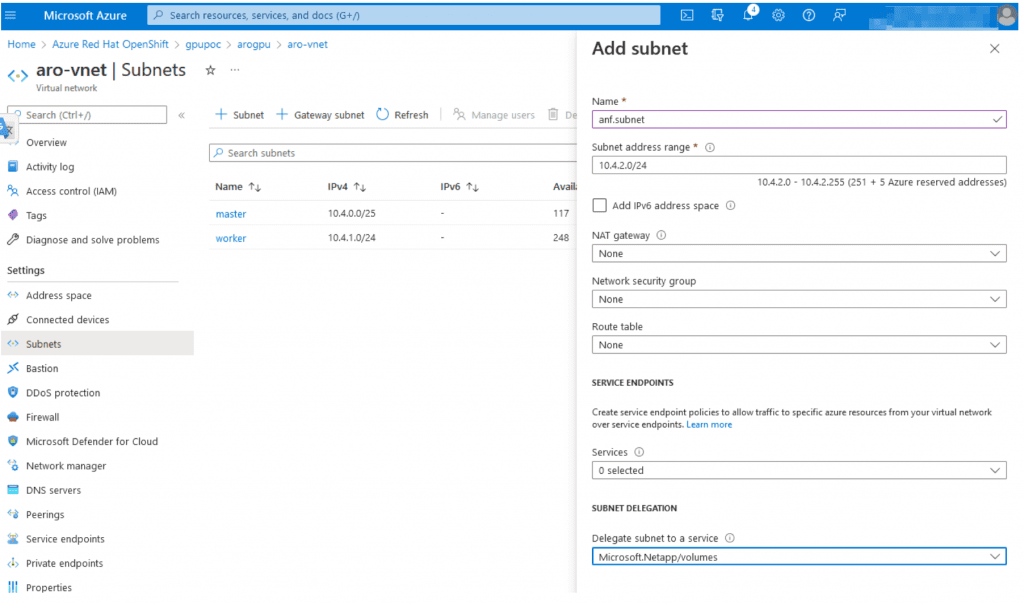
NetApp files must be have a delegated subnet within your ARO Vnet’s and you must assign it to the Microsoft.Netapp/volumes service.
You must first register the Microsoft.NetApp provider and Create a NetApp account on Azure before you can use Azure NetApp Files.
$ az provider register --namespace Microsoft.NetApp --wait
Again, for brevity I am using the same RESOURCE_GROUP and Service Principal that the cluster was created with.
					RESOURCE_GROUP="aro_azure_netapp_files"
LOCATION="eastus"
ANF_ACCOUNT_NAME="netappfiles"
					$ az netappfiles account create \
    --resource-group $RESOURCE_GROUP \
    --location $LOCATION \
    --account-name $ANF_ACCOUNT_NAME
Creating one pool for now. The common pattern is to expose all three levels with unique pool names respective of each service level.
					POOL_NAME="Standard"
POOL_SIZE_TiB=2 # Size in Azure CLI needs to be in TiB unit (minimum 2 TiB)
SERVICE_LEVEL="Standard" # Valid values are Standard, Premium and Ultra
					$ az netappfiles pool create \
    --resource-group $RESOURCE_GROUP \
    --location $LOCATION \
    --account-name $ANF_ACCOUNT_NAME \
    --pool-name $POOL_NAME \
    --size $POOL_SIZE_TiB \
    --service-level $SERVICE_LEVEL
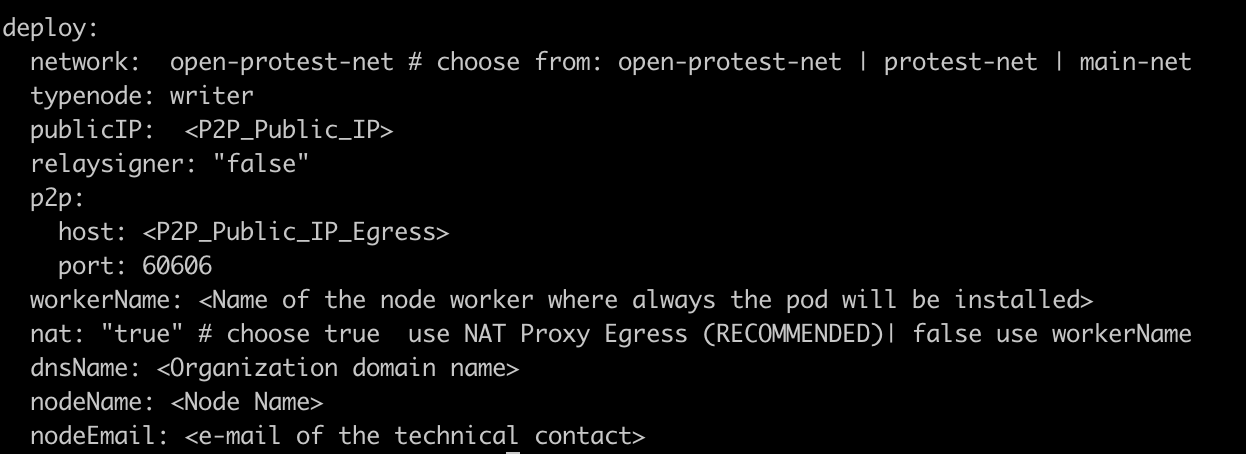
Login to azure console, find the subnets for your ARO cluster and click add subnet. We need to call this subnet anf.subnet since that is the name we refer to in later configuration.
Login to your ARO cluster. You can create a token to login via cli straight from the web gui.

oc login --token=sha256~abcdefghijklmnopqrstuvwxyz --server=https://api.randomseq.eastus.aroapp.io:6443
Download latest Trident package.
$ wget https://github.com/NetApp/trident/releases/download/v22.04.0/trident-installer-22.04.0.tar.gz
Extract tar.gz into working directory.
$ tar -xzvf trident-installer-22.04.0.tar.gz
cd into installer
$ cd trident-installer/helm
Helm install Operator
$ oc new-project trident
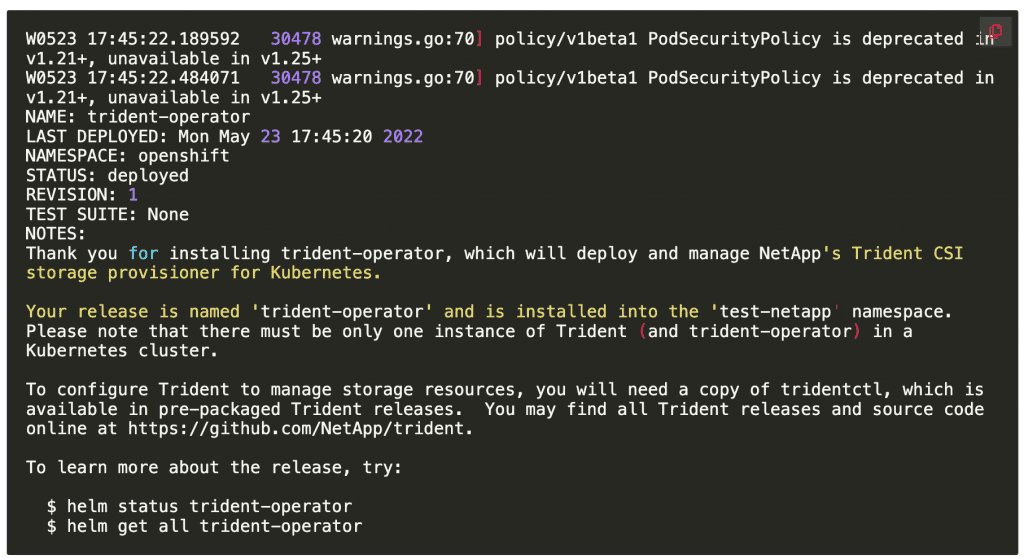
$ helm install trident-operator trident-operator-22.04.0.tgz --namespace trident
Example output from installation:
Validate:
					cd ..
./tridentctl -n trident version
+----------------+----------------+
| SERVER VERSION | CLIENT VERSION |
+----------------+----------------+
| 22.04.0        | 22.04.0        |
+----------------+----------------+
Note for mac users: take a look at the directory extras/macos/bin to find the proper tridentctl binary for MacOS
I put all my cli’s in /usr/local/bin
$ sudo install tridentctl /usr/local/bin
example output:
					$ which tridentctl
/usr/local/bin/tridentctl
FYI – Sample files for review are in sample-input/backends-samples/azure-netapp-files directory from the trident tgz we extracted earlier.
Notes:
- In case you don’t have the Service Principal Secret, you can create a new secret within the credentials pane of the service account in AAD/app registrations.
- I have used nfsv3 for basic compatibility. You can remove that line and use NetApp files defaults.
- For further steps you must ensure the Service Principal has the privileges in place. Otherwise you will face an error like this: “error initializing azure-netapp-files SDK client. capacity pool query returned no data; no capacity pools found for storage pool”. One way to avoid this situation is by creating a new custom role (Subscription->IAM->Create a custom role)with all privileges associated in official documentation (netapp for azure ) and associate this new role to the cluster’s service principal.

$ vi backend.json
Add the following snippet:
{"version":1,"nfsMountOptions":"nfsvers=3","storageDriverName":"azure-netapp-files","subscriptionID":"7aac8063-5705-4d69-976d-6c35668a968c","tenantID":"ac59c3ab-e523-4cc2-acbc-5f9c5dd6cd4d","clientID":"f3ce5f54-17a0-4f5d-891c-2525246db24c","clientSecret":"yMo8Q~QYxzXuiNQv~bHv3IX55gYB46_c-PIRNc~E","location":"eastus","subnet":"anf.subnet","labels":{"cloud":"azure"},"storage":[{"labels":{"performance":"Standard"},"serviceLevel":"Standard"}]}
run
$ tridentctl -n trident create backend -f backend.json
example output:
					+------------------------+--------------------+--------------------------------------+--------+---------+
|          NAME          |   STORAGE DRIVER   |                 UUID                 | STATE  | VOLUMES |
+------------------------+--------------------+--------------------------------------+--------+---------+
| azurenetappfiles_eb177 | azure-netapp-files | f7f211afe-d7f5-41a5-a356-fa67f25ee96b | online |       0 |
+------------------------+--------------------+--------------------------------------+--------+---------+
if you get a failure here, you can run to following command to review logs:
$ tridentctl logs
To view log output that may help steer you in the right direction.
Depending type node you want to deploy, you need execute the following command (this deployment is compalitible only Google Kubernestes Engine GKE):
To deploy a Node Writer
$ helm install <chart-name> ./charts/besu-node --namespace <namespace-name> --create-namespace --values ./values/writer.yml
e.g. deploy Node Writer on Mainnet-Omega network
$ helm install lacnet-writer-1 ./charts/besu-node --namespace lacchain-main-net --create-namespace --values ./values/writer.yml
At the end of the installation, if everything worked a BESU service will be created managed by Systemctl with Running status. Aditional objects created are namespace, service load balancer, configmap, and volume.
Don’t forget to write down your node’s “enode” :
$ curl -X POST --data '{"jsonrpc":"2.0","method":"net_enode","params":[],"id":1}' http://<PUBLIC_IP>:4545
Result:
"result" : "enode://d837cb6dd3880dec8360edfecf49ea7008e50cf3d889d4f75c0eb7d1033ae1b2fb783ad2021458a369db5d68cf8f25f3fb0080e11db238f4964e273bbc77d1ee@104.197.188.33:60606"
Don’t forget to write down your node’s “enode”. Remember that you need to provide the enode to be permissioned as indicated in the permissioning process. Also as part of the permissioning process, we need you to provide us your node address. Please get it by executing the following:
$ curl -X POST --data '{"jsonrpc":"2.0","method":"eth_coinbase","params":[],"id":53}' http://<PUBLIC_IP>:4545
Result:
{"jsonrpc":"2.0","id":53,"result":"0xa08d3d8f68ba47deb401769e5ed39ff283e60a80"}
The default configuration should work for everyone. However, depending on your needs and technical knowledge you can modify your node’s settings in values folder writer.yml bootnode.yml validator.yml, for RPC access or authentication. Please refer to the reference documentation.
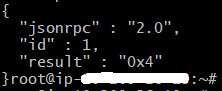
Once you have been permissioned, you can check if your node is connected to the network properly. Check that the node has stablished the connections with the peers:
$ curl -X POST --data '{"jsonrpc":"2.0","method":"net_peerCount","params":[],"id":1}' http://<PUBLIC_IP>:4545
You should get a result like this:
Now you can check if the node is syncing blocks by getting the log:
$ kubectl logs <pod name> -c <container name> -f -n <namespace>
e.g. Node Writer on Mainnet-Omega network
You should get something like this:

If you need to update the node, try redeploy the besu node: e.g. Node Writer
$ helm upgrade <chart-name> ./charts/besu-node --namespace <namespace-name> --values ./values/writer.yml
If any of these two checks doesn’t work, try to restart the besu service: e.g. Node Writer
					$ kubectl delete pod <pod name> -n <namespace>
$ kubectl delete pod besu-node-lacnet-writer-1-0  -n lacchain-main-net
If that doesn’t solve the problem, open a ticket if you already have a membership or contact us at [email protected].
If you find any issue, you can open an issue on Github and contact us at [email protected]. If you already have a membership, you can also open a ticket.
If you find any issue, you can open an issue on Github and contact us at [email protected]. If you already have a membership, you can also open a ticket.
Now that you have installed your writer node, you can follow our guides to deploy smart contracts, deploy private channels(using Ansible, using Dockers, or using Kubernetes), deploy an IPFS node, and deploy the Hyperledger Firefly stack.
Check our terms and conditions, privacy policies, and cookies policy.
Copyright 2024 © All rights Reserved. Designed by LACNet